Multiple choice custom fields allow users to choose from a set of preset options.
Create a Multiple Choice Custom Field
Account administrators can set up multiple choice custom fields by following the steps below.
Create a new custom field on the directory page and select the Multiple Choice type.
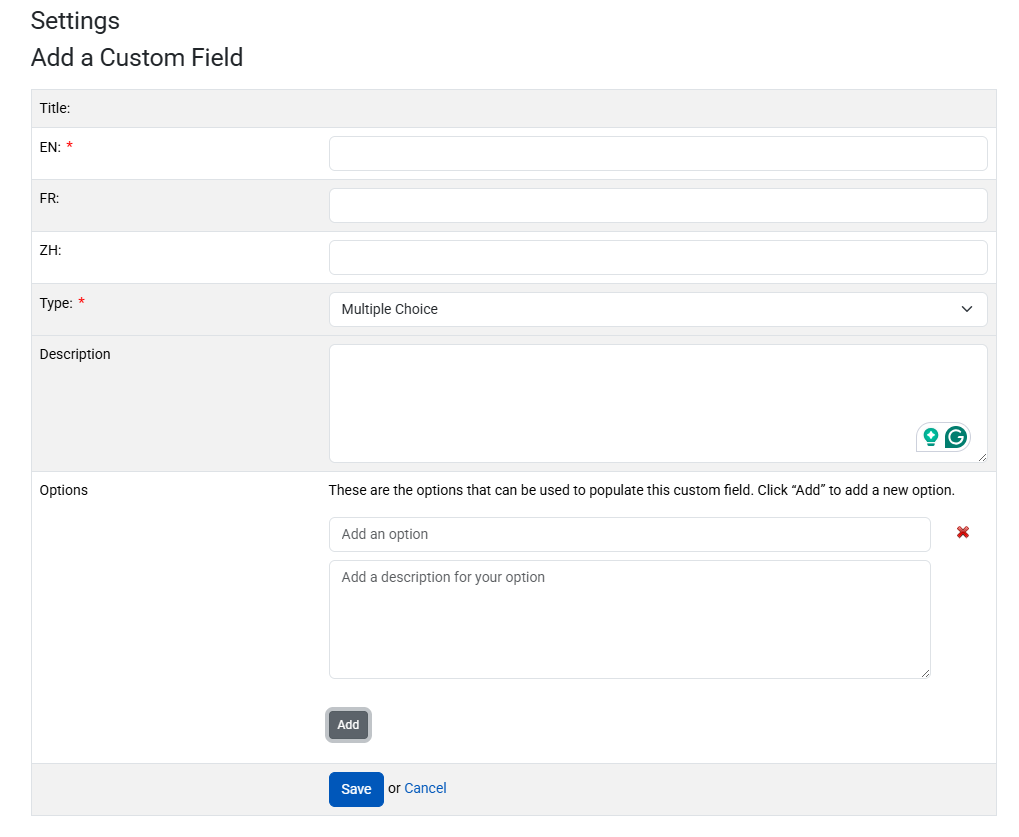
Click the “Add” button in the “Options” section that appears at the bottom of the page
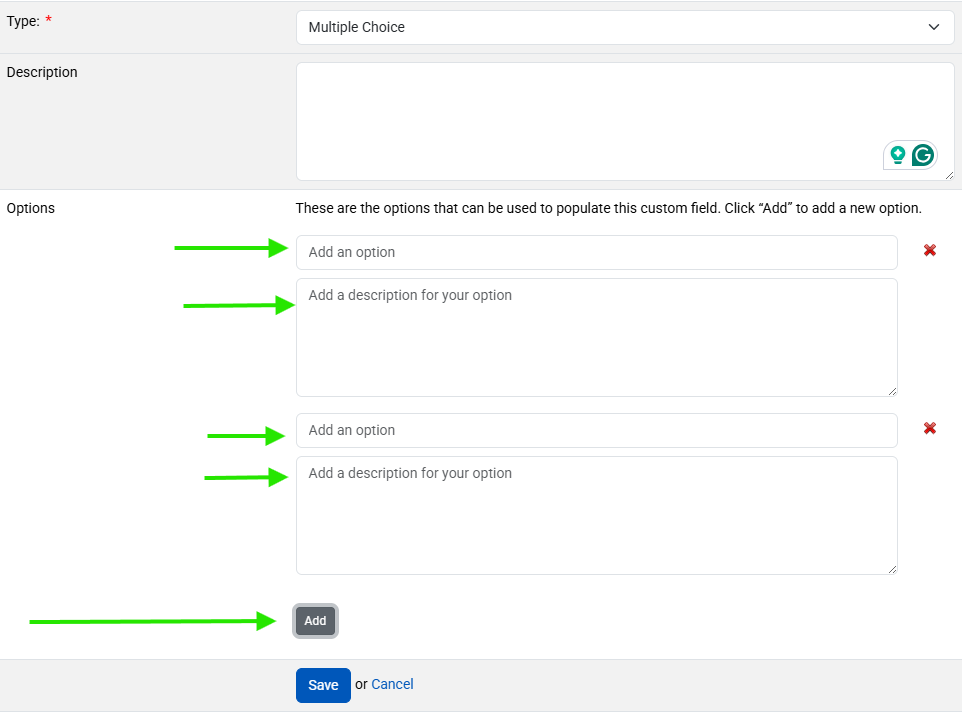
A text field will appear where you can enter options for users to select when populating the custom field. You can also add descriptions to help clarify what each option represents.
Continue clicking “Add” to add more options
Once you have entered all of your desired options, click save to create the custom field.
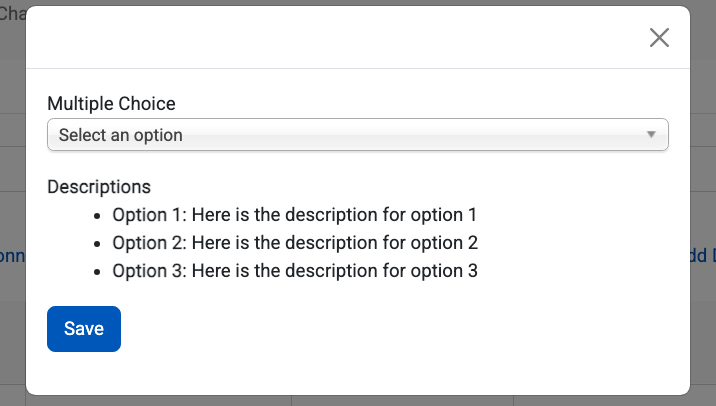
When populating these custom fields in their registers, users will be able to see the descriptions displayed in the modal.
Edit Multiple Choice Custom Fields
To edit a multiple choice custom field, Account Administrators can go to the directory page and click on its title.
On the resulting page, you will be able to edit the title and description of the custom field, add descriptions to the existing options, or add additional options.
Click “Add” to add a new option
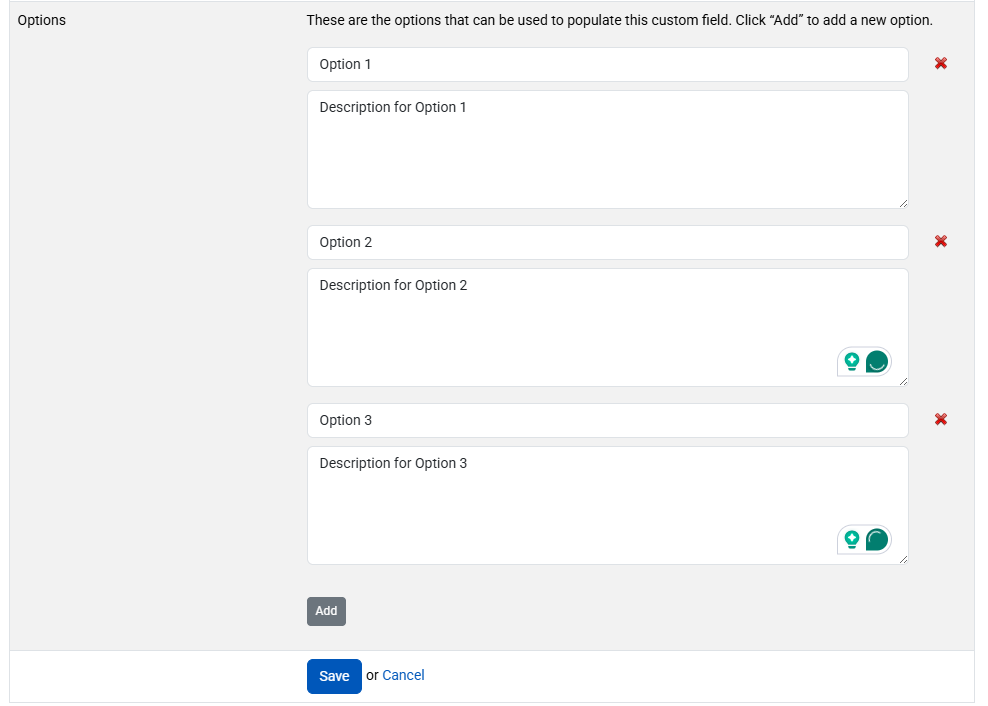
Use the X icon to delete an existing option.
Please note that it is not possible to rearrange or reorder the multiple choice options.
Please note that any custom fields that were showing the deleted option will be returned to a blank state
When you have finished, click save to apply your changes.
Was this article helpful?
That’s Great!
Thank you for your feedback
Sorry! We couldn't be helpful
Thank you for your feedback
Feedback sent
We appreciate your effort and will try to fix the article