This guide walks you through creating and managing clause-level data for your internal documents. By using the export/import functionality to break documents into clauses, you can achieve greater granularity and improve compliance tracking within your Register.
TABLE OF CONTENTS
- Permissions Required
- Option 1: Creating Clauses for the First Time
- Option 2: Updating Existing Clauses
- Important Notes
Prerequisites:
Before starting this process, you must have an internal document uploaded to your Library or Register.
To learn how to upload an internal document, please click here.
Permissions Required
The feature to create and edit parsed internal documents is only available to Administrators within the account. Standard users will not have access to the "Edit Sections", download, or import functionalities.
Option 1: Creating Clauses for the First Time
If you have an uploaded internal document that has not yet been parsed into clauses, follow these steps:
Navigate to the Library or Register page and click on the Title of your internal document.

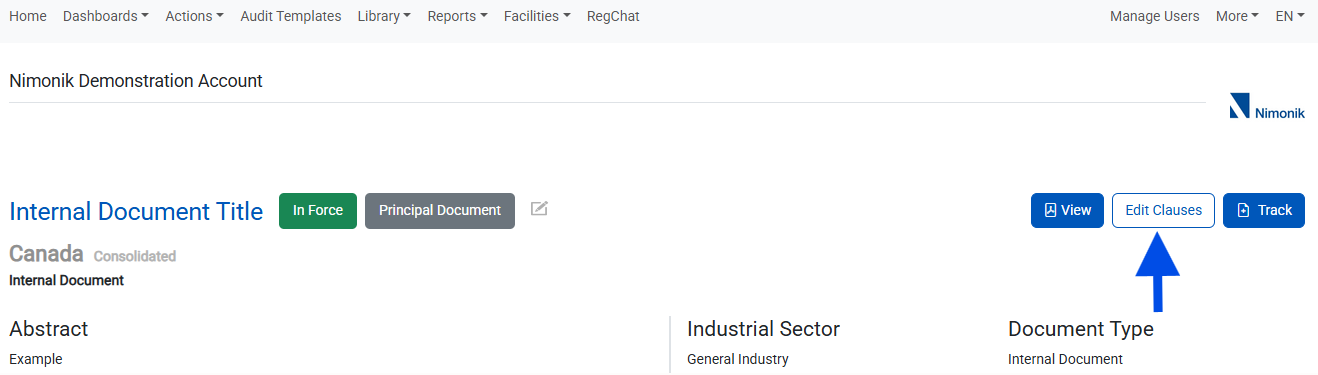
Click on the Edit Clauses button located at the top right of the document view.
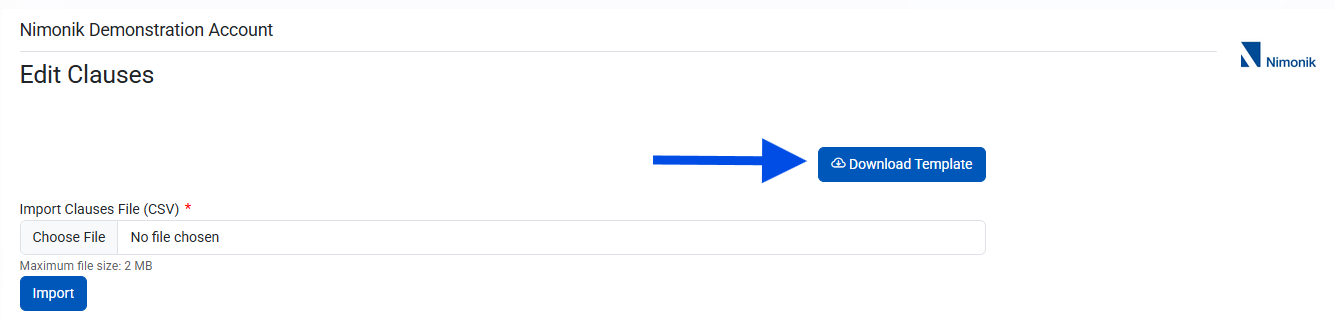
Click Download Template to download the CSV file.
Open the file in Excel or Google Sheets.
Enter your clause data according to the mapping table below.
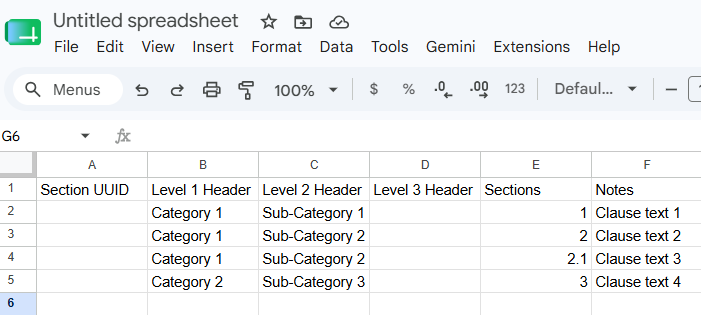
Note: Leave the Section UUID column completely empty. The system will generate these automatically upon import.
CSV Field Mapping Guide
The headers in your CSV file correspond to the following fields in Nimonik:
Save the file as a CSV (Comma Separated Values).
Click Import on the Edit Sections page and select your file.
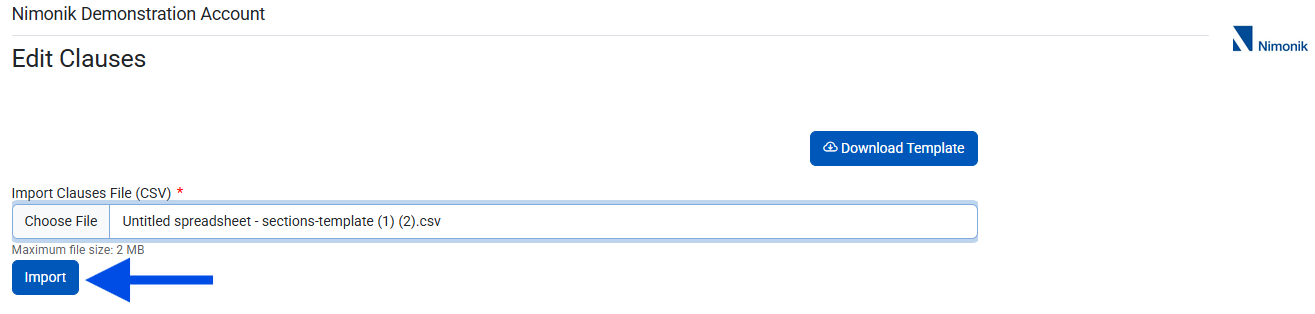
Once uploaded, you can go to your Register and toggle the Enable clause view for that document.

Result: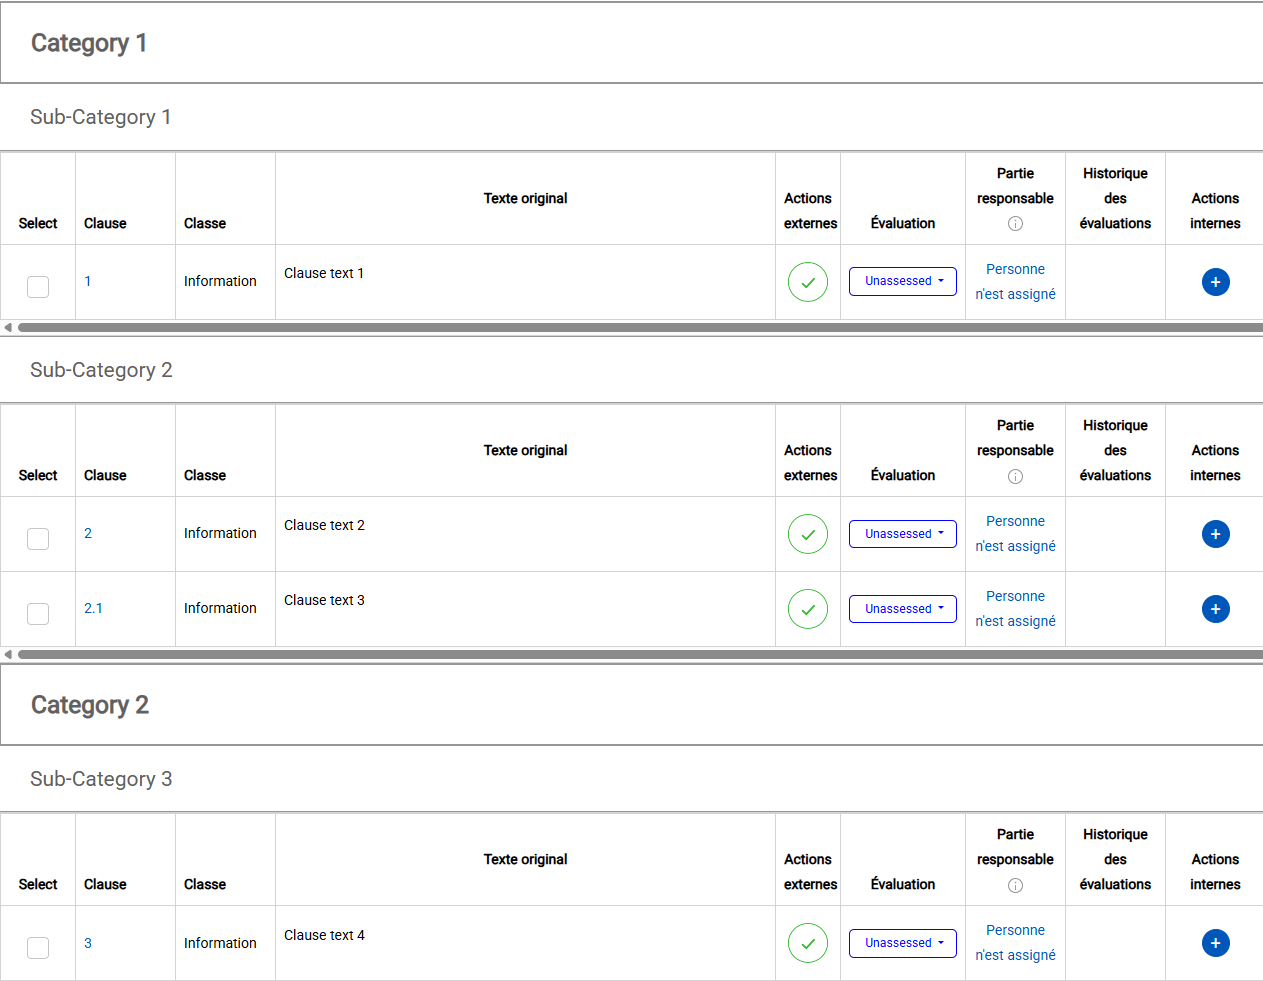
Option 2: Updating Existing Clauses
If your document already has clauses and you need to modify the text, delete sections, or add new rows, use the Download functionality.
Click the Document Title and select Edit Clauses.

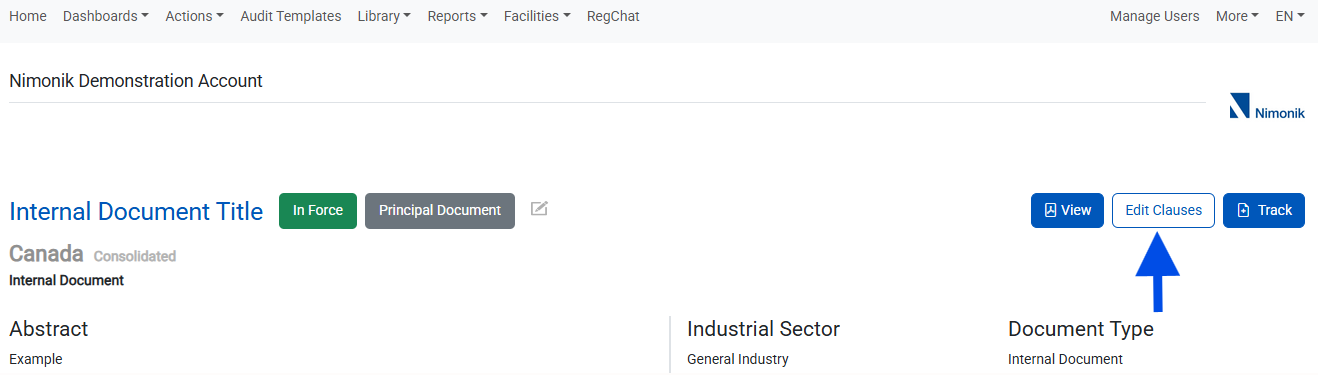
Click the Download button. This exports a CSV containing all current data, including the unique UUIDs.
Open the CSV in your spreadsheet editor.
The Golden Rules for Updates:
To ensure your data syncs correctly, follow these rules:
Do Not Touch the UUID Column: The UUID is how the system identifies which clause to update. Changing these numbers will result in errors or duplicate entries.
Modifying Text: You may edit the text in any column (Headers, Sections, or Notes). The system will overwrite the old text with your new entries upon import.
Deleting Rows: To remove a clause from Nimonik, simply delete the entire row from the spreadsheet.
Adding New Rows: You can add new clauses to an existing document.
Leave the UUID column blank for the new row.
To place the new clause under an existing heading, copy and paste the exact heading title from a previous row into the new row.
[Image highlighting a blank UUID for a new row versus existing UUIDs]
Save the file as a CSV.
Return to the Edit Sections page and click Import.
Important Notes
Privacy: Internal documents remain private and are only visible to users within your specific account.
File Format: Always ensure you are saving and uploading your file in .csv format. Excel (.xlsx) files will not be accepted by the importer.
Vigilance During Import: Be extremely careful when importing your file for upload. Importing the wrong file or an incomplete spreadsheet can overwrite your current data or permanently delete existing clauses and associated data.
Was this article helpful?
That’s Great!
Thank you for your feedback
Sorry! We couldn't be helpful
Thank you for your feedback
Feedback sent
We appreciate your effort and will try to fix the article